
You want to start coloring. However, what should you use? Crayons, markers, colored pencils? There is no right answer; the choice is yours. Based on my experience, I will discuss the pros and cons of each.
Crayons
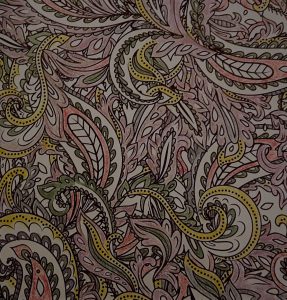
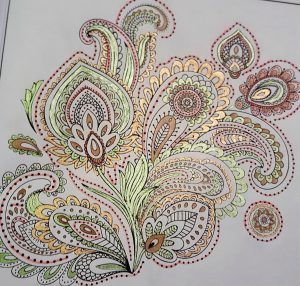
As children, I’m sure we all have used crayons to color pictures in coloring books. Most people probably have used the most popular brand, Crayola® crayons . My first set of coloring supplies was the 64 box set of Crayola® crayons. What I like most about these crayons is that they have several shades of blues, reds, purples, and oranges. The more shades of colors available, the easier it is to use them for blending and mixing various shades of a basic color. In the following example I used different shades of brown to show highlights and shading.
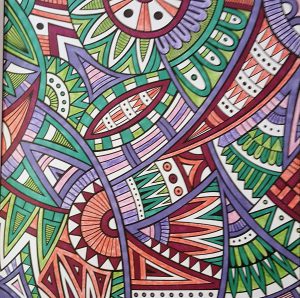
What I like best about using crayons is that they are best suited for coloring large areas. However, if I want to color smaller, more detailed areas, the tip of the crayon is too wide to stay within the lines, even after sharpening the crayon tip. In the above picture, I used a blue marker to color the small triangle shapes instead of a blue crayon because I had better control coloring within the lines. Crayons also tend to snap and break in the middle if you either drop them or apply too much pressure on them when coloring.
Colored Pencils
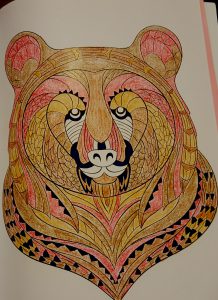
I currently use 4 types of colored pencils: non-erasable, erasable, metallic, and watercolor pencils. If you are just starting out, I would recommend you use erasable pencils. If you are coloring and choose the wrong color by mistake, you can simply erase it and your picture will not be ruined. When using colored pencils, make sure that you keep the points sharp especially if you are coloring in small confined areas. If my pencil point is too blunt, I found it more difficult to stay within the lines of the picture I was coloring. Blunt pencil points are better when you want to color larger areas or if you are shading an area.
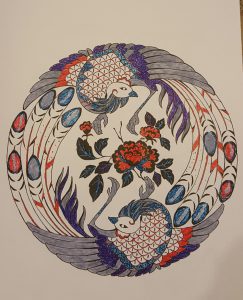
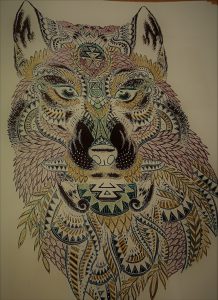
Metallic color pencils give a nice shiny metallic look to a picture. If you decide to use these type of pencils, just make sure that you choose the right colors the first time, because they are not erasable. If you try to erase with a regular pencil eraser, it just smears the color and it also messes up your eraser as well as your picture. Here is one of my pictures colored with metallic pencils:
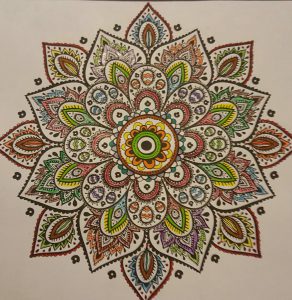
Watercolor pencils are unique in that they look like ordinary color pencils when you use them on paper. However, when you apply a wet paint brush to the colored area, the color bleeds off and it will appear as if you actually used water based paint to color the picture. In my opinion, using watercolor pencils are much less messy than paints. I would caution however, that the hardest thing to control is how wet to make the paint brush to spread the color on the paper. If the brush is too wet, it will make the paper too wet, which will wrinkle up when it dries. Here is an example of how a picture looks when dry watercolor pencils are used and after water is then applied.
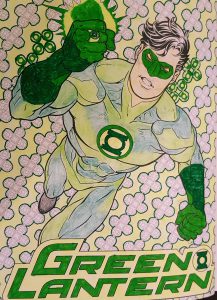
Green Lantern with dry watercolor pencils
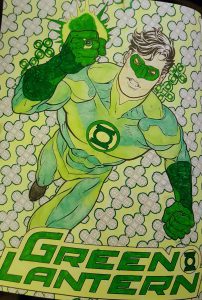
Green lantern with wet watercolor pencils
As you can see, if you apply water to the colors, they will make the colors blend in a way that looks like you just used paint from the beginning. By the way, I used regular markers for the gloves, lettering, and background.
Ink and Gel Pens
In my experience thus far, I have not mastered the technique of controlling how much ink comes out of gel pens so that they do not create ” ink blobs” on the picture which then has a tendency to smear and smudge across the paper. However, metallic gel pens give a nice glittery, glossy effect on the pictures. So, if you like glitter and shine, metallic gel pens are the way to go. Regular writing ink pens on the other hand, are much easier to control the amount of ink that comes out. However, just be aware that if you want to color a picture with ink pens, you will have to go back and forth with the pen until the entire area you wish to color is colored. The more times you go back and forth over the space, the darker the color. Here are some pictures I colored using metallic gel pens and writing ink pens:
Picture using ink pens
Picture using gel pens
Colored Markers
Out of all the different coloring utensils I have used, colored (magic) markers are my favorite. I like using them because the colors are very bright and vibrant; my pictures seem to come alive when I use them. There are so many types to choose from–fine tips, broad tips, Sharpie® markers, you name it. The biggest drawback in using markers is that the colors sometimes bleed through the paper, causing the color to appear on another picture if you are using a coloring book. To prevent this, place a blank sheet of paper between the image you are coloring and the next page. If any color does bleed through, it will bleed onto the blank sheet of paper instead of the next page of your coloring book. Another thing to keep in mind is that once you start coloring with markers, they are permanent–there is no erasing with markers.
Fine tip markers are best when you want to color small defined areas; broad tip markers are best for larger areas. I also want to point out that when you are using light color markers (ie. yellow or light orange) in areas in close proximity to areas that were colored with dark color markers, make sure that the dark color areas are completely dry before using the light color markers. Otherwise, some of the dark color may dirty the tip of the light color marker and you will get a blending of colors when you reuse the light color marker. Here are some pictures where I used colored markers:
Colored using Sharpie® markers

Colored using regular markers
Now that you have some basic information about each type of coloring utensil, you can decide to use either one type of utensil or a mixture of utensils. There is no law that says that only one coloring utensil can be used per picture. For instance, you can use both colored pencils and crayons on a picture; or you can use colored markers and pencils. I have done this quite often myself and was quite pleased with the results. Here are some examples:
Metallic pencils and gel pens
Colored using crayons and markers
I hope that the information I have provided will get you started coloring. The hardest part of coloring is sometimes just getting started. Don’t worry so much about what colors to use; you can start with your favorite color and just go from there. If you have any questions, comments, or coloring experiences you would like to share, please enter it in the comment section below. Have a blessed day!
Hi, I started coloring last winter, and I soon discovered that the only medium that feels good to me is using gel pens. They go on smoothly and never blob for me. I have trouble finding gel pens that are in more natural colours of nature, for instance basic colours like browns, greens, and so on. I got two gifts of gel pens , in rather large sets but there are so many metalics and neon colours. If I am coloring an animal that needs more natural browns, I am out of luck LOL!
Hi Madeleine,
I have used gel pens on some of my pictures, but they are not my favorite items to use because they often blob on the paper. How do you control the amount of ink that comes out of these pens so that the ink does not blob? In regards to finding natural brown and green colors, have you tried using colored pencils? I have colored pictures using a combination of gel pens and colored pencils and the results worked out quite well. I would also suggest looking into metallic pencils. Thanks for commenting; I enjoy hearing other people’s thoughts about this subject.
Deidre